A site for my handmade cards, accompanied by my photos and written meanderings which are occasionally witty, often tongue-in-cheek, and rarely profound. Beginning in June 2013, you'll also see lots of NBUS, which is an acronym I coined for Never-Before-Used-Schtuff. Note: my Privacy Policy can be found at a tab below and you can find my NBUS Challenge online. I hope you'll join in the fun there! Thanks for coming by! Have a beverage and enjoy!

Showing posts with label HLS Christmas. Show all posts

November 6, 2023

Fall Into Winter

Hello Stamplings!

I'm looking through welcome raindrops and hoping you are doing well. These raindrops would not be happy drops for those of you in the UK, Italy, and France where everyone is sick of the incessant rain and wind. My sympathy to all those who have experienced flooding and damage.❤

I'm straddling the holiday tables in the Playhouse these days. Usually I like to finish one holiday before I start another and if I'm honest, I think I need to go back to that way of designing. Or maybe I'll start a trend and next year everyone will be putting fall leaves on their Christmas trees! 

Fall
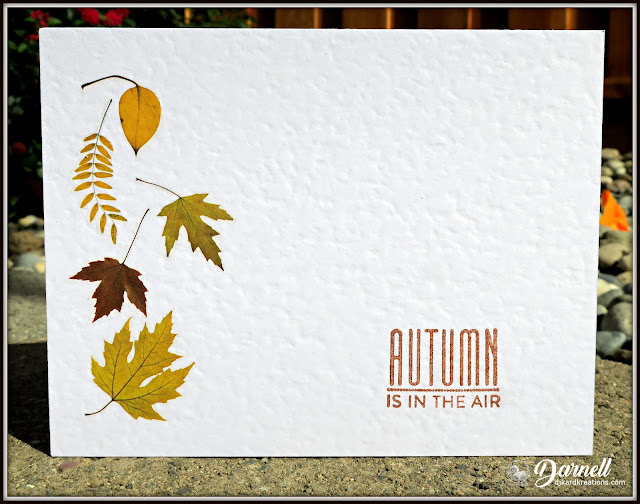
1. This photo should be in the dictionary under QACAS (quick and clean and simple). I used some beautiful rub-on leaves from Taperlogy and a sediment from PTI stamped in copper ink onto hammered card. This is my first time using these rub-ons and the color and detail of their images is amazing.
2. For this card, I used a fall leaf e/f and Hammy picked out a piece of schplattered pp for the background. The autumn sediment is from Technique Tuesday stamped with fall-colored inks. The leaves were cut from pp or from snippets from old smooching or alcohol inking in my stash. You know how alcohol always leads to smooching ... that's all I gonna say about that because you know what I mean.
3. This card is also uber QACAS, using the same pp and a found sediment strip from my stash. The leaves were die-cut using a friend's dies and pp from her stash!

Challenges
Another simple design, except for the hours it took for the layers of Glossy Accents to dry on the sediment! I think the snowflake circle die is from Hero Arts, but I can't find it at the mo. The joy die is definitely from Hero Arts and it's definitely cut from the same dark purple paper as the card base, even though the photo makes it look black. 

Challenges
~~~

Enjoy your day! No, seriously, enjoy! LITS!*

As always, thank you for coming by to visit the Playhouse and special thanks to you if you take the time to join as a follower! 
*Life is too short!

September 19, 2023

Autumn, Birthday, and Christmas AI and Tin Foil

Hello Stamplings!

How are you? I hope you are doing well and enjoying yourself wherever you are! I have a Threefer to show you what I've been playing with this past week, so get your comfy shoes on. I don't know what that has to do with it, but okay, comfy shoes are good.

I was watching a You Tube video (don't ask me which one) and you know how one ends and another one starts automatically, especially if your attention drifts and you start looking out the window? The new video turned out to be a Marion Emberson video using the technique of alcoholic ink on kitchen aluminum foil. 

That led me on a search of other videos and I found blogs where this has been done ten years ago! Maybe there are even older ones? So perhaps you played with this technique long ago, but I must have been in the Principal's office that day. (No surprise that.) That's one of many cool things about the Interworlds: you can always find new and new-to-you crafty things to try!

Onefer
To make a large foil panel in fall AI colors (below), I glued a piece of aluminum foil to cardstock and folded over the sides. Once I was satisfied with the colors, I die-cut the leaves using a Simon Says Stamp die called, "Etched Laurel Leaves." The brick e/f background was in my BOB. Hammy decorated it using his feet daubers and metallic inks. I gold heat-embossed the sediment, ran a copper ink pad around the border of it and the two panels and ... shazambam, it was done!

Here is the panel of tin foil after inking:
And here are a few leaves I die-cut to make into more cards:
Challenges:
Twofer
How about these for bright alcohol colors?? Sorry, I should have warned you to put on your sunglasses! The above is actually my first result using AI on aluminum foil. I didn't get the subtle results that Marion did and that's an understatement! But I have to say, the bold jewel tones are beautiful in real life. I used a Sizzix e/f for added texture ala Marion. 

Challenges
Threefer

There were quite a few spots of ink that remained sticky on the brightly colored panel I made, so I stuck on gold foil in those spots before dry embossing. Even after that, however, it wasn't completely sticky-free. I was concerned about ink getting on my embossing folder, so I laid a sheet of opaque vellum over the colored foil before I closed the lid and embossed it. 

When I lifted the embossing folder and removed the vellum, sure enough there was quite a bit of ink on the vellum. All that ink would have been on my embossing folder and now, WOW, I ended up with this stunning sheet of vellum, which natch, I made into a card. 

Here's a closeup:
The photos don't do the vellum panel justice. I will be doing this technique again, both for the foil results and for the vellum mop-ups!

Challenges

~~~

If I saw the date right, I just noticed there is a new Gina K. video about using AI on glitter foil so maybe this technique is making a comeback. Can't wait to watch the video and try it on glitter paper!

Enjoy your day! No, seriously, enjoy! LITS!*

Rereading this I have to add: If I've done this technique before at a retreat with you, please forgive me for not remembering. It's sad that I feel like I have to add that to my posts now, but I'm finding that I am often "very sure" that something happened or didn't happen, only to find out I am not remembering or misremembering. My brain is all filled up, I guess, and now things are starting to overflow out the back!

As always, thank you for coming by to visit the Playhouse and special thanks to you if you take the time to join as a follower! 
*Life is too short!

September 14, 2022

Gesso and Shine!

Hello Stamplings!

Look it's me again already! I have had a few good days and took advantage of it to play in some favorite challenges. Put on your sunglasses!

Onefer
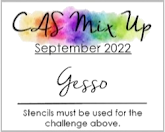
This card is for CAS Mix UpThis month the challenge is hosted by Hilary and the prompt is to use gesso with a stencil. I'm not gonna lie, I bungled a bunch of paper having a play with gesso. It's not difficult to work with, just sometimes things go awry. Or amiss. Or askew. You gotta love words. Where awas I? Oh, yes, gesso. 
(The word gesso is red-underlined throughout the draft of this post, indicating it is misspelled. I right-clicked on gesso to see what was wrong with my spelling, only to find out that Blogger thinks I'm trying to type the word gestapo!)

For this make, I pounced gesso through a Funky Fossil stencil and let it dry. Like mashed potatoes, I over-indulged a bit with the gesso, but I still liked the result. Of all the videos I watched about various ways to use gesso, I chose to spray color over the dry gesso'd panel. I used my NBUS Wendy Vecchi Mica Sprays in cornflower blue, buttercup, and pearl. Well to be honest, since the bottles are small, Hammy did the schpraying. Both panel and hamster are ablaze with schparkle.

I'm not sure why, but some of the spray was not resisted by the gesso. Anyone? Anyway, as if that schparkle wasn't enough, I added the gesso panel to a shiny gold card base which I embossed with SU's Subtle e/f. The die-cut sediment was in my stash, made from a snippet of Brusho'd Yupo paper.

Twofer
I don't know if it was the black card background or what, but I couldn't capture the brightness of all that gold even in the sunlight. This is one of my favorite poinsettia stamps. It is "Festive Poinsettia" from Altenew. I made similar cards last year because it's very QACAS with the simple gold-embossed image and sediment. A stitched gold frame finished it off ... as well as allowing Hammy free reign with a wee paintbrush and pot of watered down gold ink.

Challenges

Texting While Old

Here's a funny thing I do and I'm wondering if you do it, too: whenever I write a text message to someone on my cell phone, as I'm hitting send I look up to the top to see if I'm sending it to the person I intend.

As.I'm.hitting.send.

Which, of course, is too late if you're sending it to the wrong person! Every time I do it, I think what a moron I am ... yet every time that's what I do!😄

~~~

Enjoy your day! No, seriously, enjoy! LITS!*

As always, thank you for coming by to visit the Playhouse, being a follower, and leaving me some love!

*Life is too short!

To open the pop-up comment box that let's you jump to the end w/o scrollingClick CTL + Home. Click the Home tab under my blog banner which resets the post. Click Page Down to reach the end of the post. Click Comments and a pop-up box opens. Click "Jump to Comment Form" and wallah, no more car pool tunnel! Mwah! (p.s. If you ask me a question in your comment, please remember to leave me your email address so I can respond. Thank you!)

August 17, 2021

Dog and Cat Pals?!

Hello Stamplings!

How are you? I hope you enjoyed the weekend and that your week has started off on the right foot. And if you happen to be left-footed, I hope it starts off on the right left foot.

Because this month is the last and final challenge for my Twofer Card Challenge, I wanted to make another set of Dog/Cat designs to remind you. (The challenge closes at 11:55 p.m. on August 24th.)
For my reminder cards, I picked a fun stamp that has BOTH a dog and a cat! It's called "Picture Perfect" and it's from MFT.

Onefer
This card design uses one of the cute images in the set. I just love it and I thought the sediment from Tim Holtz was perfect for the dog's expression. I mean, he is so harassed, he doesn't even have whiskers! Hammy schparkled them with his winker, glossified their noses, and I stenciled paw prints on the background using a Simon Says stencil gifted from a friend. 

Twofer
I love that at first glance you don't even seen the white cat on this design. I stamped and then fussy-cut her to nestle her behind the tree ~ poised to jump out of her hiding place and scare someone, imp that she is! The tree is from Dee's Distinctively and I die-cut it twice so I could made the tree taller to accommodate little Ms. Abominable Snowcat!

I tried every way from Sunday to capture the schparkle on this card, but alas the sun wasn't cooperating. In real life the white heat-embossed snowfall is glistening and I love the shine from the SU Chrystal Effects which Hammy added to the hills, tree, and cat's eyes and nose. The snowflakes are an all-over "Brush Splatter Background" stamp from MFT.

Challenges

Final Challenge and Prizes

I hope you are able to find some time to play along in the last Twofer Card ChallengeDesign Team member Bonnie has another pair of awesome Twofer designs to inspire you over on the challenge blog!

And when you're over on the TCC blog, you'll see that I've added two prizes for two lucky winners! Check it out!

Thank you again for all your support the last four years and for all the warm comments you have left me.

 
PSA re Cutting Plates 

If you own any warped cutting plates for any brand of die-cutting machine, here is a link to a Jennifer McGuire video on Fixing & Avoiding Warped Plates. The supplies needed are what you have on hand, plus a couple hours of your time, depending on how many warped plates you have.

I followed her video and it worked a treat. I'm now set for life with flat cutting plates and I am so grateful Jennifer figured this out and took the time to make a video to share it with us ~ even while they were away at the lake! Thank you, Jennifer. 

It bears repeating that we are a wonderfully kind and sharing community!

~~~

Enjoy your day! No, seriously, enjoy, and keep safe! LITS!*

As always, thank you for coming by to visit the Playhouse and special thanks to you if you take the time to join as a follower! Please let me know you came by so I can be sure and return the flavor.

*Life is too short!

To open the pop-up comment box that let's you jump to the end w/o scrollingClick CTL + Home. Click the Home tab under my blog banner which resets the post. Click Page Down to reach the end of the post. Click Comments and a pop-up box opens. Click "Jump to Comment Form" and wallah, no more car pool tunnel! Mwah! (p.s. If you ask me a question in your comment, please remember to leave me your email address so I can respond. Thank you!)

July 17, 2021

It Makes My Bird-Loving Heart Happy!

Hello Stamplings!

I think the summer heat has gone to my head. I was talking to a friend last week about any plans for traveling in the fall and then I asked her if she was going to make her usual trip to the Midwest in late June or early July? Needless to say, she cocked her head in the universal gesture of, "What the hay is wrong with you?!" Oh. This getting old thing is a mental surprise every day. As is the calendar!

Speaking of calendar, it's time to remind you that the current Twofer Card Challenge ends on July 24th. It makes my bird-loving heart happy to see the pairs of birdies in the gallery!
You can imagine the fun I had making these cards! The BIRD stamp my two different designs have in common and which I just HAD to have, is NBUS from Art Impressions. (Bird-Brains UMD1878.) 

Onefer
There are only about a million reasons why you could use this chicken on a card, especially when you have the snarky sediments from Tim Holtz. I used this card as a humorous thank you card for my SIL. The background is a piece of pp (pats self on back). The stitched square frame is from MFT. For the background behind the chick, I did a blend of yellow and gold inks through a honeycomb stencil. I zigged the chicken and Hammy winked her. She was really out cold cuz she never moved a feather and you know it had to tickle, especially on those feet!

Challenges


Twofer
And then I got nostalgic and turned my chicken into a Christmas wreath. Chicken wreaths used to be a tradition in a small town in Missouri where my sister once lived. She moved several years ago and the tradition may be going on for all I know. The youngsters had such fun dying the feathers and feet green and red while the grownups sat behind the wood shed and drank moonshine. For weeks afterwards the kids would show up at school with their hands and arms dyed up to their elbows! (Hanging a chicken wreath on your door was thought to ward off sickness. I personally think the stink warded off visitors and hence nobody brought germs into your house.)

Hammy made the wreath even more festive by adding a wee holly stamp here and there and then winking the entire wreath. I heat-embossed the sediment in princess gold powder and chomped the corners.

Challenges
~~~

I hope you have time to play in the Twofer Card Challenge this month! We all have bird stamps, dies, or stencils that are just waiting to fly onto your two different card designs! We are fortunate to have Maria and Coni as our guest designers, as well as lots of inspiration from the talented Design Team!
~~~

Enjoy your day! No, seriously, enjoy and keep safe! LITS!*

As always, thank you for coming by to visit the Playhouse and special thanks to you if you take the time to join as a follower! Please let me know you came by so I can be sure and return the flavor!

An update from the Back Department: both of us are much better, still waiting for some medical follow ups, but all in all 👍! I send my return best wishes to all of you (or your family) who are suffering with illness or floods or drought. 

*Life is too short!

To open the pop-up comment box that let's you jump to the end w/o scrollingClick CTL + Home. Click the Home tab under my blog banner which resets the post. Click Page Down to reach the end of the post. Click Comments and a pop-up box opens. Click "Jump to Comment Form" and wallah, no more car pool tunnel! Mwah! (p.s. If you ask me a question in your comment, please remember to leave me your email address so I can respond. Thank you!)