A site for my handmade cards, accompanied by my photos and written meanderings which are occasionally witty, often tongue-in-cheek, and rarely profound. Beginning in June 2013, you'll also see lots of NBUS, which is an acronym I coined for Never-Before-Used-Schtuff. Note: my Privacy Policy can be found at a tab below and you can find my NBUS Challenge online. I hope you'll join in the fun there! Thanks for coming by! Have a beverage and enjoy!

Showing posts with label HLS Anything Goes With Dies. Show all posts

September 19, 2023

Autumn, Birthday, and Christmas AI and Tin Foil

Hello Stamplings!

How are you? I hope you are doing well and enjoying yourself wherever you are! I have a Threefer to show you what I've been playing with this past week, so get your comfy shoes on. I don't know what that has to do with it, but okay, comfy shoes are good.

I was watching a You Tube video (don't ask me which one) and you know how one ends and another one starts automatically, especially if your attention drifts and you start looking out the window? The new video turned out to be a Marion Emberson video using the technique of alcoholic ink on kitchen aluminum foil. 

That led me on a search of other videos and I found blogs where this has been done ten years ago! Maybe there are even older ones? So perhaps you played with this technique long ago, but I must have been in the Principal's office that day. (No surprise that.) That's one of many cool things about the Interworlds: you can always find new and new-to-you crafty things to try!

Onefer
To make a large foil panel in fall AI colors (below), I glued a piece of aluminum foil to cardstock and folded over the sides. Once I was satisfied with the colors, I die-cut the leaves using a Simon Says Stamp die called, "Etched Laurel Leaves." The brick e/f background was in my BOB. Hammy decorated it using his feet daubers and metallic inks. I gold heat-embossed the sediment, ran a copper ink pad around the border of it and the two panels and ... shazambam, it was done!

Here is the panel of tin foil after inking:
And here are a few leaves I die-cut to make into more cards:
Challenges:
Twofer
How about these for bright alcohol colors?? Sorry, I should have warned you to put on your sunglasses! The above is actually my first result using AI on aluminum foil. I didn't get the subtle results that Marion did and that's an understatement! But I have to say, the bold jewel tones are beautiful in real life. I used a Sizzix e/f for added texture ala Marion. 

Challenges
Threefer

There were quite a few spots of ink that remained sticky on the brightly colored panel I made, so I stuck on gold foil in those spots before dry embossing. Even after that, however, it wasn't completely sticky-free. I was concerned about ink getting on my embossing folder, so I laid a sheet of opaque vellum over the colored foil before I closed the lid and embossed it. 

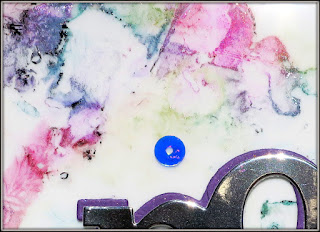
When I lifted the embossing folder and removed the vellum, sure enough there was quite a bit of ink on the vellum. All that ink would have been on my embossing folder and now, WOW, I ended up with this stunning sheet of vellum, which natch, I made into a card. 

Here's a closeup:
The photos don't do the vellum panel justice. I will be doing this technique again, both for the foil results and for the vellum mop-ups!

Challenges

~~~

If I saw the date right, I just noticed there is a new Gina K. video about using AI on glitter foil so maybe this technique is making a comeback. Can't wait to watch the video and try it on glitter paper!

Enjoy your day! No, seriously, enjoy! LITS!*

Rereading this I have to add: If I've done this technique before at a retreat with you, please forgive me for not remembering. It's sad that I feel like I have to add that to my posts now, but I'm finding that I am often "very sure" that something happened or didn't happen, only to find out I am not remembering or misremembering. My brain is all filled up, I guess, and now things are starting to overflow out the back!

As always, thank you for coming by to visit the Playhouse and special thanks to you if you take the time to join as a follower! 

*Life is too short!

May 12, 2023

Imagination!

Hello Stamplings!

How are you? I hope you got something out of this past week, which is just a blur to me thanks to migraines and lots of appointments. We are so happy to finally be getting our new backyard fence installed, but it has been hard to concentrate with the hammering and the good-looking carpenters just outside my Playhouse window. 

Ahem, where was I? 
Sometimes I buy stamps on sale long after they are released and even then they stay on NBUS Mountain for years more. Slap! Such is the case with this little bear from MFT's "Sprinkling You With Love." He was delighted to finally be given some love. He was die-cut, colored with my Ziggies, popped up, and googly-eyed.

After wards, I went to my pp drawer (😲) looking for some grassy and or flowery paper to plant him on. Hence the froggy pp. What better scene than a schparkly froggy in the rain? Hammy added the raindrops and the clouds finished it off. The sediment is from the same set. I like that I can use this card for many occasions.

Now you may think, "Oh, dear, this time she has gone too far with a giant frog who is bigger than the bear! 

Well ... really though? I mean, if you think about it, you've got a bear holding an umbrella and on top of the umbrella is a bunny holding an umbrella! Given the imagination it took to draw that image, I don't think the artist will mind that I paired her bear with this goofy frog!

Challenges
~~~

No time for a Christmas card today, but I have a funny for you!
~~~

Enjoy your day! No, seriously, enjoy! LITS!*

Happy Mother's Day to everyone celebrating this weekend. Extra hugs to those of you who find this day hard to get through.💕

*Life is too short!

To open the pop-up comment box that let's you jump to the end w/o scrollingClick CTL + Home. Click the Home tab under my blog banner which resets the post. Click Page Down to reach the end of the post. Click Comments and a pop-up box opens. Click "Jump to Comment Form" and wallah, no more car pool tunnel! Mwah! (p.s. If you ask me a question in your comment, please remember to leave me your email address so I can respond. Thank you!)

March 12, 2023

Spring and Winter Party of Twofer ...

... your table is ready.

Hello Stamplings!

How are you? In America we all moved our clocks ahead one hour before we went to bed last night. Apparently there is an army of tiny trolls who come into our homes in the night, collect the hours, and then keep them in a secret place until fall arrives and then they reverse the process and give us our hours back. 

I think there should be exceptions or exemptions or exclusions. Like if you've reached retirement age, you get to keep your hour. The last thing I need in a day is less time! 

So Justin Case you need help waking up or staying awake today, I made you this:
Can I just say up front that the gold paper I used for the wooden die-cut frame (from Hero Arts) does not look holographic until it gets in the sunlight. It's rather magical, but I'm entering a gold and green color challenge with it and, honest, I didn't use rainbow paper! And the top bud is celery green, not yeller. 

While we've been having endless rain, I've been die-cutting endless little croci bits from my NBUS BontaniCuts Crocus from The Greetery and gluing the bits into little flowers. These two were made in just green shades for the above-said challenge because I have my artistic license. You'll be seeing the others dressed in color on a future blogcast. The schparkly gold background panel, gold heat-embossed sediment, and die-cut frame were all in my Stasherooni.

Challenges
Twofer
Hammy and I pulled out all the stops for this one. The background snow was created using transparent gloss paste through the Tiny Dots stencil from Memory Box. Then (after I placed a snowy hill mask in place) Hammy used his new blending shoes to create the blue sky. 

On watercolor paper I stamped and clear heat-embossed the NBUS scarf-wrapped cat from Stampers Anonymous "Snarky Christmas." I painted him with my Ziggies and fussy-cut him. I was really tempted to just cut off his teeny-weeny arms and legs, but after fortification with a bit of potato liquor, I forged ahead. 

I then popped him up on foam lifters and added googly eyes and the sediment. It still seemed to need something to keep the focus on the cat (duly winked by Hammy), so I added the frame. I also gave his feet a shadow in the snow, but the sunlight washed them out.

Here is a closeup of the glazed snow and winked cat:
Challenges
~~~

You haven't had a Nellie fix in a while:
Like today's Christmas cat, Nellie likes to be swaddled, but sometimes her blankie gets askew and it's too dang cute. Don't ask me how many photos we have like this. You just have to take one look at her face to know it's been too many as far as she's concerned.

~~~

Enjoy your day! No, seriously, enjoy! LITS!*

As always, thank you for coming by to visit the Playhouse and special thanks to you if you take the time to join as a follower! Please let me know you came by so I can be sure and return the flavor!

Many of you have asked how we are faring with the storms and flooding that have hit California. We are fine, but it's really bad in some areas, with more to come.🙏

If I'm not back before the end of the week, have a Happy St. Patrick's Day!

*Life is too short!

To open the pop-up comment box that let's you jump to the end w/o scrollingClick CTL + Home. Click the Home tab under my blog banner which resets the post. Click Page Down to reach the end of the post. Click Comments and a pop-up box opens. Click "Jump to Comment Form" and wallah, no more car pool tunnel! Mwah! (p.s. If you ask me a question in your comment, please remember to leave me your email address so I can respond. Thank you!)

December 15, 2022

Christmas Joy

Hello Stamplings!

I've got a quick post, but a long ending, so if you can spare five minutes, grab a bev and relax with me from the Hustle and Bustle of this festive season. 

Onefer
This was a fun design to put together. The "Children Skating" are NBUS from Impression Obsession. They are so cute by themselves, but then I thought it might be even cuter to have them holding on to a sediment and the Joy die from Hero Arts worked great. 

Then I set the card across the room, as I always do, and Hammy and I conduct the internationally known Head-Cocker Test. You know, where you slowly cock your head to the right, back to the center, and then to the left. For this card, we liked the skaters holding up the JOY, but we agreed that they looked like they were floating in space. It was Hammy who suggested I cut the thinnest strip of the same shiny ivory paper to make a horizon line. Once I connected the j and y, that seemed to do the trick in a unique way.

Challenges
Twofer
This card looks intentional, but twasn't. I used a panel of copper to emboss the NBUS folder from SSS called "Pine Bouquet." Actually, I took a day where I simply embossed a bunch of NBUS folders and set them aside for cards. 

On a different day, I inked the NBUS deer from Honey Bee's "Silent Night" set and heat-embossed her in clear. Then I painted her and her sweet birdie friend with my Ziggies. Hammy winked the wee bird, but he left it at that because he had just gotten into my chocolate almond toffee and could barely lift a paw, let alone a winker.

Both elements of the design sat in their respective places until the day the universal craft axis tilted on its score pad and they ended up on my desk at the same time where, by some miracle, I was able to put two and two together, as it were. Mwah! Love it when that happens!

Challenges


That's it for cards, but I wanted to share this story I originally saw on Facebook. 

But, Madam!

A woman decided to give herself a big treat for her 70th birthday by staying overnight in a really nice hotel. When she checked out the next morning, the desk clerk handed her a bill for $250. She demanded to know why the charge was so high.

"I agree it's a nice hotel," she said, "but the rooms aren't worth $250 and I didn't even have breakfast!" The clerk told her that $250 was the 'standard rate,' and breakfast had been included had she wanted it.
The woman insisted on speaking to the Manager.
The Manager appeared and, forewarned by the desk clerk, announced: "This hotel has an Olympic-sized pool and a huge conference center which are available for use." "But I didn't use them," the woman declared.

"Well, they are here," replied the Manager, "and you could have used them."

The Manager went on to explain that she could also have seen one of the in-hotel shows for which they were so famous, reminding her that "we have the best entertainers from around the world performing here."

Frustrated, the woman cried, "But I didn't go to any of those shows!"

"Well," he said, unmoved, "We have them, and you could have." 

No matter what amenity the Manager mentioned, she replied, "But I didn't use it!" and the Manager countered with his standard response. 

After several minutes going back and forth, the woman took out her checkbook, wrote a check and handed it to the Manager. The Manager was surprised when he looked at the check. "But, Madam," he said, "this check is for only $50!"

"That's correct," she said, looking him straight in the eye, "I charged you $200 for sleeping with me." 
"But I didn't!" he exclaimed. "Well, too bad," she said, "I was here, and you could have."
~~~

Enjoy your day! No, seriously, enjoy! LITS!*

As always, thank you for coming by to visit the Playhousebeing a follower, and leaving me some love!

*Life is too short!

To open the pop-up comment box that let's you jump to the end w/o scrollingClick CTL + Home. Click the Home tab under my blog banner which resets the post. Click Page Down to reach the end of the post. Click Comments and a pop-up box opens. Click "Jump to Comment Form" and wallah, no more car pool tunnel! Mwah! (p.s. If you ask me a question in your comment, please remember to leave me your email address so I can respond. Thank you!)

November 14, 2022

Christmas All The Way

Hello Stamplings!

I'm here. Remember when I used to say the week had whooshed by ~ back when I was younger and posting every day or every other day? I can't believe I ever did that. Now, at this age, whole weekS are whooshing by and I just sit here, stunned.🌀 

Especially this time of year and especially since I'm having a flare up of Arthur Itis in my thumb/wrist. It's hard to make cards and type with only one hand, as many of you know.

But enough about me. How are you doing? I hope you are well and if not, I hope you (and your mojo) feel better soon.

Before Arthur came to roost, I had a bit of fun in the Playhouse!

Onefer
This sweet bunny is NBUS from the "Silent Night" stamp and die set from Honey Bee Stamps. He is stamped in black ink, clear-embossed, and given a silver fur coat with my Ziggies. 

The background is an embossed birch forest using a Darice embossing folder. It was embossed on glossy paper, made light blue with a prayer and CP stone blue ink. Oh, haha, I also used a brayer! I made a snowy hill so Bunny could sit and play with his big feet and tickle his toes while listening to the blue bird sing* Christmas carols.

*In this photo, the bird is singing the seldom-heard "Be Merry" song by the Christmas Minstrels, not to be confused with The New Christy Minstrels. It goes something like this: "Be Merry, Be Merry, Be Merry, Be Merry, Be Merry, Be Merry, Be Merry, Be Merry, Be Merry," and it's often accompanied by a cocktail with a cherry.

Challenges

Twofer
I made several embossed birch trees on glossy white paper, so for once I made a second card right then and there. Go, me! This time I used the Birch Trees die from Cottage Cutz over top of the embossed birch trees. I cut one layer in white gloss and one layer in black for a shadow and glued them together. Because I like b/w and red together and because I had used glossy white paper, I die-cut the sediment in red glossy paper. I used the same red for the outer borders, as well as for the little bird.

Actually, that little red glossy bird is part of another birch tree die I have. (No one needs this many, said no one ever.) This one is from Mama Elephant. I actually die-cut several of them and then spent prolly an hour placing them in different branches, here and there, always in odd numbers, as one does. 

One, three, five, seven? Okay, no more than that, Shirley? In the end, I climbed up out of the rabbit hole I was in and as you see (with invaluable assistance from Hammy), I settled on one solitary bird. We think one is more impactful somehow, because, you know, Art.

Challenges


____________________________________________________

~~~

Enjoy your day! No, seriously, enjoy! LITS!*

©Rachel Wilhelm
I may not be back for a while, what with my thumb limitations, a long-weekend destination wedding to attend, company coming, Thanksgiving, and a load of Christmas cards yet to make ... ~ 🌀!

As always, thank you for coming by to visit the Playhousebeing a follower, and leaving me some love! Happy Thanksgiving! I am blessed by ~ and I appreciate ~ the gift of your friendship and support!

Mwah!
*Life is too short!