Hello Stamplings!
I hope you're doing okay as another week whooshes by. I walked by a store yesterday and they had Halloween costumes in the window!
Mmm, no. That's a lie. I'm not going downtown and, hence, I didn't walk by a store with Halloween costumes. But the way this year is flashing by, perhaps it is happening!
I'm here to remind you that there is only one week left to enter your cards in the 29th showing of the Twofer Card Challenge, where the prize is ten million dollars and the prompt is:
🦋BUTTERFLIES!🦋
What? Wait. No. Move over. You see what happens when I let Hammy type my post! What a liar he is! (Well, that's a bit harsh. He thinks of it as teasing.) There is no prize other than the possibility of seeing your name up in lights on the winner's post! But, hey, that's always fun!
We made these two designs to inspire you:

These are a bit artsy-ish for me, aren't they? You could say I've spread my wings! 😆 This time the item my two cards have in common is a NBUS stamp from Docraft Papermania called, "Square Urban Stamp."
Onefer

For this encouragement card, I simply stamped the image with Versamark and heat-embossed it in gold on black card. The gold-embossed sediment is from STAMPlorations. To focus your eyes, I added gold border strips on each side. QACAS. (Wouldn't this image be perfect stamped on coasters?)
Challenges
- Happy House: The treasure of nature.
- NBUS: Any never-before-used-schtuff.
- Stamping Sensations: July: All creatures great and small.
- TIME OUT: Peaceful.


Twofer

For this birthday card design, I placed a square card over a piece of scratch paper and verrrrrry carefully stamped the image in black four times around the corners of the card (after first stamping off once to mute the black ink). Then I had a lie down and asked myself why I hadn't just used my gray ink pad.
Then I cut two circles out of the center. I replaced the center circle after gold-embossing the sediment from Stamps of Life, "Sentiments4Circles." I colored the butterflies in oranges and Hammy added his winking, even though you can't see the schparkle nor the juiciness of the oranges. Finally, for a little dementia, I ran an orange marker around the inner rim of the outer circle.
Then I cut two circles out of the center. I replaced the center circle after gold-embossing the sediment from Stamps of Life, "Sentiments4Circles." I colored the butterflies in oranges and Hammy added his winking, even though you can't see the schparkle nor the juiciness of the oranges. Finally, for a little dementia, I ran an orange marker around the inner rim of the outer circle.
Challenges
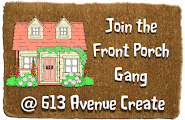
- 613 Avenue Create: A/G (Optional twist: sediment is the focus.)
- Butterfly Challenge: The letter "A" with options. Mine: butterfly + apricot.
- Seize the Birthday: Anything birthday goes.


~~~
I hope my cards have inspired you to make two butterfly designs per the rules and join in the fun at the Twofer Card Challenge! Mwah!


~~~
I will leave you with a photo of one of the butterflies I am blessed to see enjoying the butterfly bush outside my Playhouse window. It's not a Monarch visiting this time, but the large tiger swallowtails are equally mesmerizing!

Enjoy your day! No, seriously, enjoy! LITS!*
As always, thank you for coming by to visit the Playhouse and special thanks to you if you take the time to join as a follower! Please let me know you came by so I can be sure and return the flavor! I'm slower at visiting now, however, because I'm older and I look out my window a lot.
As always, thank you for coming by to visit the Playhouse and special thanks to you if you take the time to join as a follower! Please let me know you came by so I can be sure and return the flavor! I'm slower at visiting now, however, because I'm older and I look out my window a lot.

*Life is too short!
To open the pop-up comment box that let's you jump to the end w/o scrolling: Click CTL + Home. Click the Home tab under my blog banner which resets the post. Click Page Down to reach the end of the post. Click Comments and a pop-up box opens. Click "Jump to Comment Form" and wallah, no more car pool tunnel! Mwah! (p.s. If you ask me a question in your comment, please remember to leave me your email address so I can respond. Thank you!)